Moving house in the UK is stressful enough without worrying about whether your new bed frame will actually fit through the door or if you have the right screwdriver for that mysterious flat-pack box. If you are a student preparing for a move between terms or graduating, handling furniture is one of the most practical skills you need to master. It saves money on removal vans, prevents damage to your deposit, and ensures you aren't stuck with a pile of wood and metal parts when you arrive at your new place.
Most student accommodation involves dealing with flat-pack furniture, which is pre-cut and pre-drilled furniture sold in boxes requiring self-assembly. Brands like IKEA, Ingka Holding B.V. dominate this space, but retailers like John Lewis and Argos also offer similar products. Knowing how to take these apart carefully and put them back together efficiently is a game-changer for your bank balance and sanity.
The Golden Rules of Flat-Pack Management
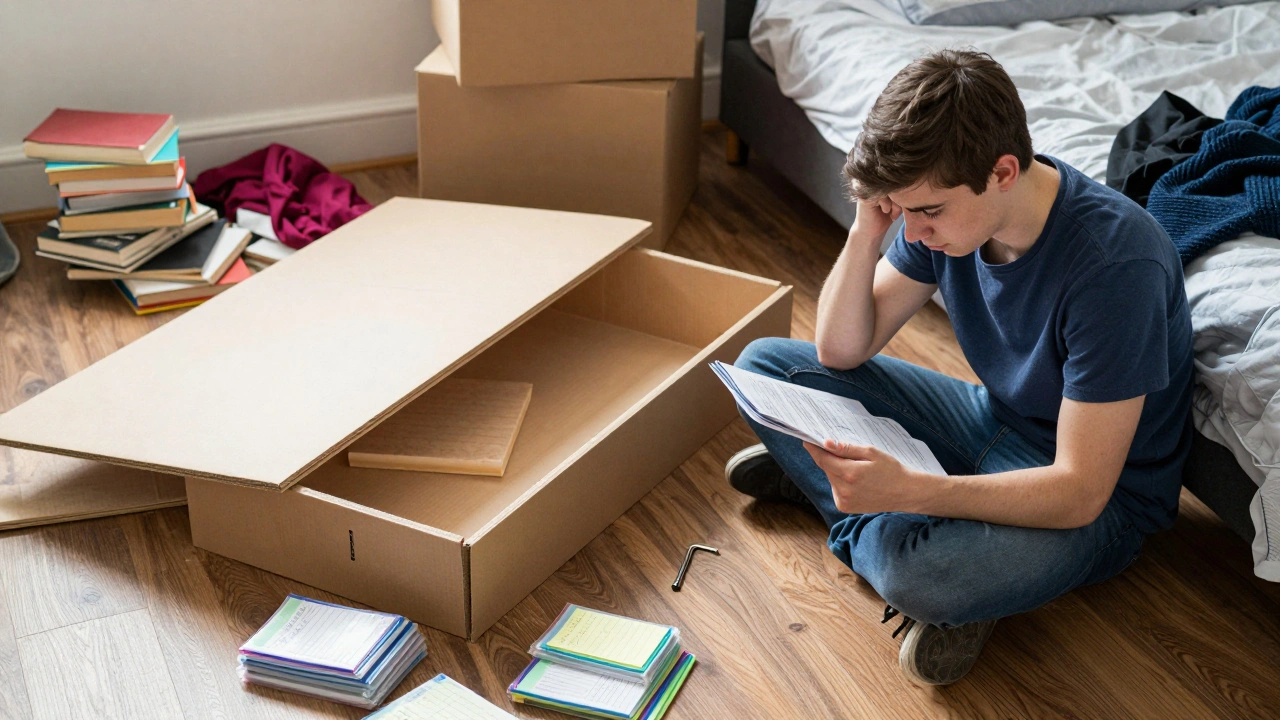
Before you even touch an Allen key, you need to adopt a specific mindset. The biggest mistake students make is treating furniture as disposable during a move. You don't throw away the instruction manual because "you remember how it goes." You keep every single piece of hardware. Here is the core philosophy:
- Never lose a screw: Use small zip-lock bags labeled with the step number (e.g., "Step 4 - Side Panel Screws").
- Photograph the process: Take pictures before disassembling each major section. This creates a visual reference that is often clearer than the printed diagrams.
- Check for damage first: Inspect panels for cracks or loose joints before taking anything apart. If it's broken, fix it now, not after the move.
- Label everything: Use masking tape and a marker to label parts on both sides (e.g., "Headboard Left").
This approach turns a chaotic pile of wood into an organized system. It also makes reassembly significantly faster because you won't be hunting for missing dowels or guessing which board goes where.
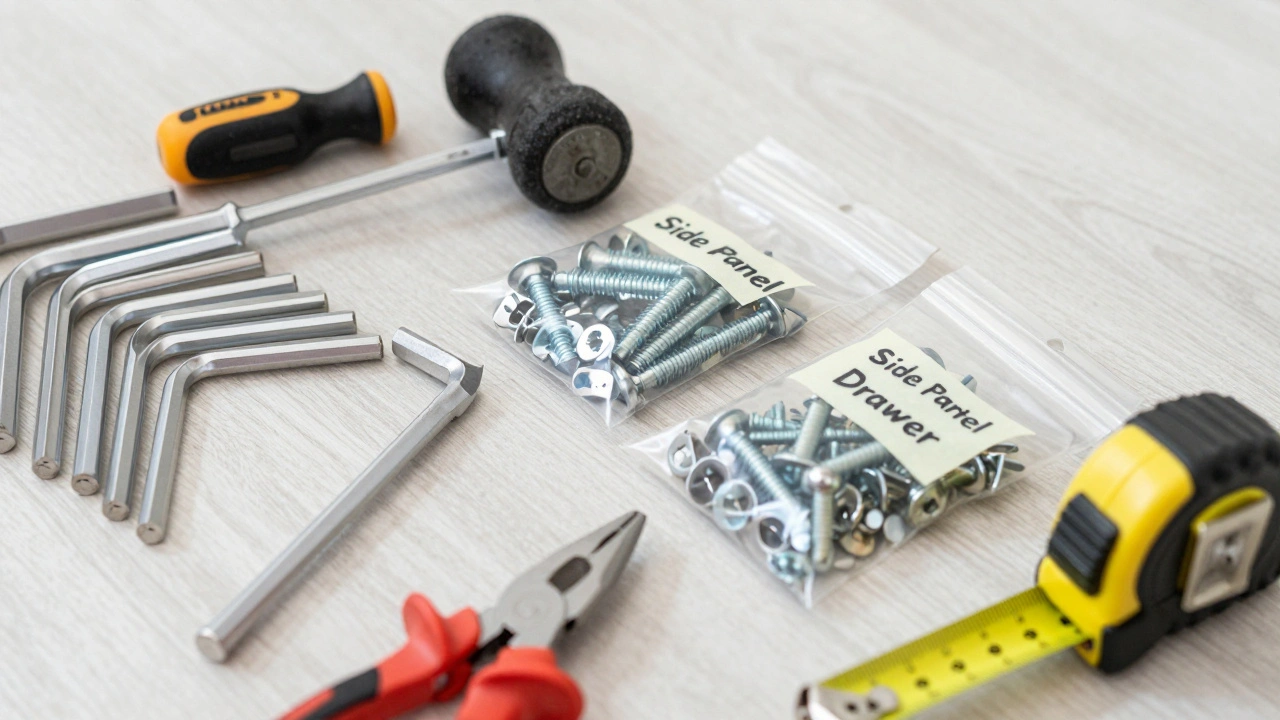
Gathering Your Toolkit
You cannot assemble or disassemble furniture effectively with just a coin and a nail. Investing in a basic toolkit pays off immediately. For UK student moves, here is what you absolutely need:
| Tool | Purpose | Why It Matters |
|---|---|---|
| Allen Key Set (Hex Keys) | Tightening hexagonal bolts | Standard for almost all flat-pack furniture; prevents stripping screws |
| Phillips Head Screwdriver | Tightening cross-head screws | Often needed for drawer runners and shelf brackets |
| Rubber Mallet | Gently tapping joints together | Prevents damage to particle board edges compared to a metal hammer |
| Pliers | Removing stubborn pins or holding parts | Useful for extracting wooden dowels if they get stuck |
| Tape Measure | Checking dimensions | Ensures furniture fits through doors and stairwells before full assembly |
A common pitfall is using power drills to tighten final screws. While tempting, this often strips the soft particle board material found in most student furniture. Always finish tightening by hand to ensure a snug fit without damaging the threads.
Step-by-Step Disassembly Process
Disassembling furniture is often more delicate than assembling it. The goal is to remove components without breaking the cam locks or stripping the screw holes. Follow this sequence for best results:
- Clear the area: Remove all clothes, books, and personal items from shelves and drawers. Empty the furniture completely.
- Remove removable parts first: Take out drawers, doors, and glass shelves. Place these separately and wrap them in cardboard or blankets to prevent scratches.
- Document the structure: Take photos of the front, back, and inside of the unit. Note any unique connectors or brackets.
- Loosen, don't fully remove: For complex joints, loosen the screws slightly to allow movement, then fully remove them once the tension is gone. This prevents forcing joints apart.
- Separate large panels: Gently pull apart side panels from top and bottom boards. Use a rubber mallet to tap stubborn joints loose if necessary.
- Bag and label hardware: As you remove screws, bolts, and cam locks, place them in labeled bags. Keep cam locks attached to their corresponding panels if possible to avoid losing the locking mechanism.
If you encounter resistance, stop. Forcing a joint can crack the particle board. Instead, check if you missed a hidden connector or if a dowel is misaligned. Patience here saves hours of frustration later.
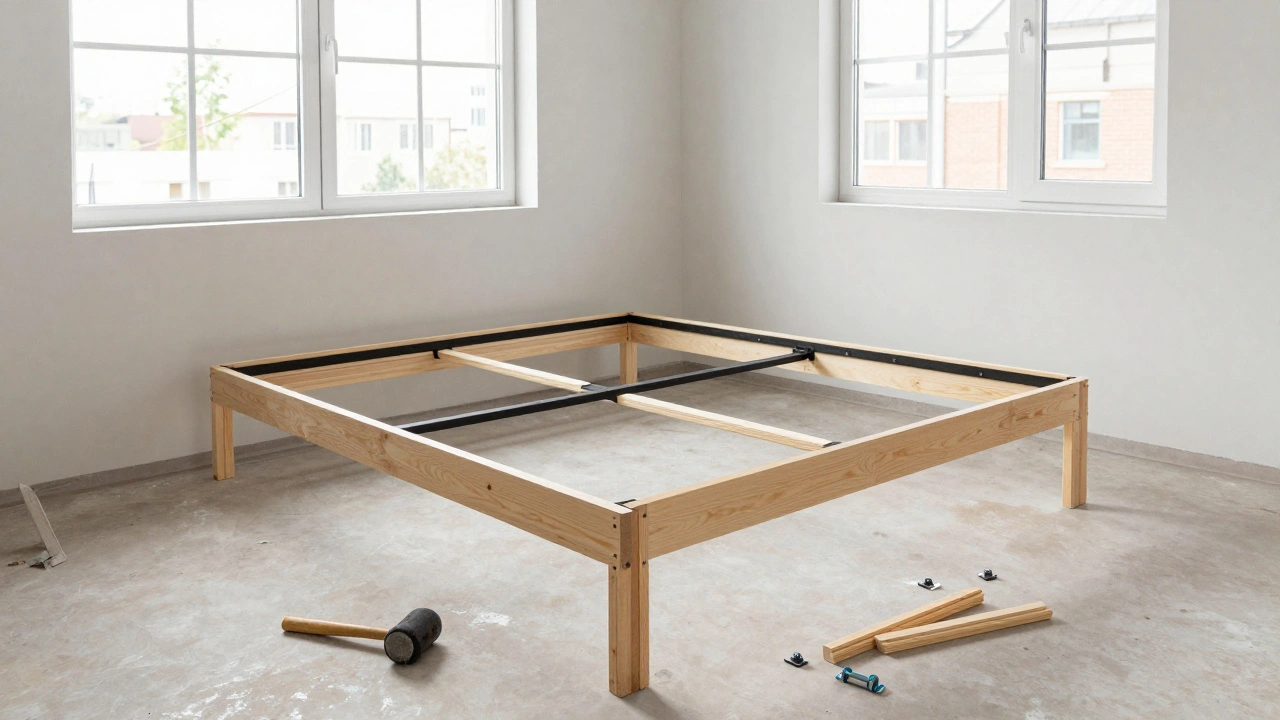
Reassembly Strategies for New Accommodation
When you arrive at your new place, the environment matters. Don't try to assemble furniture on a carpeted floor if you can avoid it. Hard surfaces allow pieces to slide into place more easily. If you must work on carpet, use a piece of cardboard or an old towel under the furniture.
Start with the base or frame. Most flat-pack units rely on a sturdy foundation. Ensure all dowels are inserted correctly before attaching side panels. A helpful tip is to insert all wooden dowels into one panel before connecting it to another. This keeps the alignment clean and prevents twisting.
Pay close attention to cam locks. These circular fasteners are critical for structural integrity. Insert the bolt, align the cam lock over it, and turn the square handle clockwise until tight. Do not overtighten, as this can strip the plastic housing. Once locked, gently tap the joint with a rubber mallet to ensure the panels sit flush.
If you find that the furniture is wobbly after assembly, check the floor level. Uneven floors are common in older UK student housing. Adjust the feet if available, or use shims made from cardboard or cork to stabilize the unit.
Handling Specific Furniture Types
Different furniture types require different approaches. Beds, wardrobes, and desks each have unique challenges.
Beds
Bed frames are often the largest items. Focus on removing the slats first and stacking them neatly. The headboard and footboard usually detach from the side rails via bolts. Keep the center support beam separate, as it is long and awkward to transport. When reassembling, ensure the center support is aligned correctly to prevent sagging.
Wardrobes
Wardrobes are prone to tipping if not assembled correctly. Remove doors and hanging rails early in the process. Be cautious with mirror-backed doors; these are fragile and should be wrapped individually. During reassembly, anchor the wardrobe to the wall if possible, especially in high-rise student accommodations, to prevent accidents.
Desks and Shelves
These units are lighter but often have many small connectors. Label each shelf clearly (Top, Middle, Bottom) to avoid confusion. Check that all adjustable feet are tightened securely before placing heavy items on the desk.
Transportation Tips for Student Moves
Once disassembled, proper packaging protects your furniture during transit. Use bubble wrap or old sheets to cover panels. Tape the corners of larger boards to prevent chipping. If you are using a van, load heavier items like beds and wardrobes first, placing them against the wall of the van. Fill gaps with smaller boxes to prevent shifting.
For stairs, always carry furniture vertically rather than horizontally when possible. This reduces the risk of snagging on banisters and makes maneuvering easier. Ask for help-lifting alone increases the chance of injury and damage.
Common Mistakes to Avoid
Even experienced movers make errors. Here are the most frequent pitfalls:
- Ignoring the manual: Assuming you remember the steps leads to reversed panels or missing connections.
- Using excessive force: If something doesn't fit, it's likely misaligned, not too tight.
- Mixing hardware: Screws from one piece may look identical to another but have different lengths or thread pitches.
- Assembling on uneven ground: This causes warping and weak joints.
- Skipping final tightening: Loose joints lead to wobbling and eventual collapse.
Avoiding these mistakes ensures your furniture lasts throughout your studies and beyond.
What is the best way to store flat-pack furniture during a gap year?
Store disassembled furniture in a dry, climate-controlled environment. Keep all hardware in labeled bags sealed within the original box. Wrap panels in plastic sheeting to protect against moisture and dust. Avoid stacking heavy items on top of flat panels to prevent bending.
Can I reassemble IKEA furniture multiple times without damaging it?
Yes, most IKEA furniture is designed for multiple assemblies. However, repeated tightening and loosening can wear down cam locks and screw threads. Handle hardware gently, avoid overtightening, and inspect joints for wear before each reassembly.
What should I do if I lose a screw or cam lock?
Contact the manufacturer directly. Many companies, including IKEA, sell replacement hardware kits online. Alternatively, visit a local hardware store with the missing part to find a match. Using incorrect replacements can compromise stability.
Is it safer to hire professionals for furniture assembly?
Hiring professionals ensures correct assembly and saves time, but it adds cost. For standard flat-pack items, DIY is feasible with patience and tools. Consider professional help for large, complex, or expensive items like built-in wardrobes or heavy bookshelves.
How do I prevent scratches on furniture during a move?
Wrap each panel individually in moving blankets, bubble wrap, or old sheets. Secure wrapping with tape, avoiding direct contact with the surface. Use corner protectors for edges. Transport furniture upright to minimize surface exposure.